

Hi everyone, welcome to this guide to The Pale City. The current version includes a list of sidequests and missable items, as well as a brief walkthrough. Eventually, I also plan to add a list of tips, as well as strategies for a few of the game’s more difficult battles.
Thanks a lot to anyone who has played the game! I’d be very eager to hear from you with any comments, questions, or suggestions—including anything you’d like to see covered here.
Table of Contents
Tips (SPOILER FREE):
This section has a few tips that aren’t always explained clearly in-game. However, they can be very useful if you’re struggling to survive, so I hope they help!
Combat:
1: Experiment with the wound and guard break skills, as it’s difficult to do well in combat without them.
2: Offensive and defensive stance aren’t always necessary, but can tip things your way in more difficult fights–especially if you activate them before battle, which you can do in the pause menu.
3: Defensive stance (which has often been the most neglected by players) can be extremely useful when facing large groups. Particularly if whittle them down with wound, build TP, and switch to offensive stance at the right moment.
4 Sweep is most useful when combined with offensive stance–particularly if you activate offensive stance before the battle begins.
5: Guard doesn’t just raise defense–it’s also one of the only ways to restore your HP. Combined with life essences, it’s the most effective way to heal in the game.
6: Evasion bonuses from parry stack with defensive stance; same for the defense bonuses from guard.
7: Bleeding (which causes you lose a few HP each turn) can be applied randomly by any bladed attack, and concussion by any blunt one. Each of them can stack up to five times. They can be healed by using a bandage.
8: The Killing Blow skill really does have a 75 percent chance of bringing an enemy (any enemy) to 1 hp. Altogether, it costs 20 TP. It can be a useful alternative boss strategy for any fight in the game.
Items and Money:
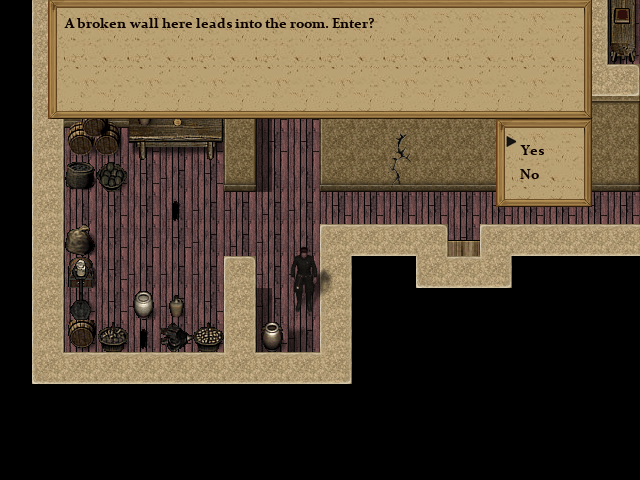
1: For those struggling with the early game, bombs can be quite useful (though they become less powerful later on). One of them can make a dent in a large group; two can basically take them out… while being much cheaper and more plentiful than thunder scrolls. There are two stashes in the Sink: one in the hidden room on the second floor of the bar, and another in the well beneath the lake.
2: A general note on hoarding items–unlike many other RPGs, special items such as fire and thunder scrolls are most useful in the early and middle act of the game (which are also the most challenging), so I would suggest using them when you need them rather than saving for the last dungeon. However, there are very few of them in the game, so it can still be useful to save them for the right moment.
4: That being said, on normal mode, I suggest saving money early if you’re interested in buying the Cold Steel Longsword (which is by far the most powerful weapon in the game, and may be necessary to complete certain side-content). In particular, I would suggest not buying new weapons and armor when you first reach the Sink–though there’s some armor laying around if you know where to look….
Side Quests and Missable Items:
This is SPOILER FREE list of side quests for players who’d like to make sure they experience everything the game has to offer. Also, a partial list of the more important/useful items not associated with quests.
The Sunken Stronghold:
1: After fighting the Nihiloghast, walk right on the platform towards where it was standing and you’ll be prompted to “walk into the darkness”, where you’ll find a thunder scroll.
The Sink (first visit)
Visit each of these areas for an optional sidequests. Also, some (hopefully) interesting conversations and lore.
1: The Chain House–a small building on the southwest side of the marketplace in the Sink, west of the House of Life.
2: Zosia’s House–a small house on the east side of the marketplace.
3: The well beside the lake in the Sink. Inspect it, and you’ll be prompted to enter.
4: The playwright standing by the stage in the arena.
5: The arena for optional battles (after fighting the two warriors with Ognjen). Some of these are quite hard, so there’s no shame in coming back later.
6: Voragar in the House of Life (after completing the Tree Museum).
Missable Gear and Items:
1: Stash in a hidden room on the second floor of the Enclave.
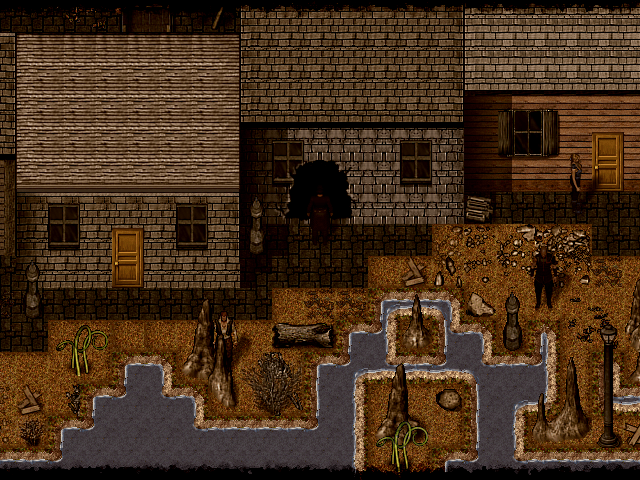
2: Armor on a corpse in the residential district of the Sink, above the lake. (This can really help to get through some of the more difficult fights in the first act.)

The Academy:
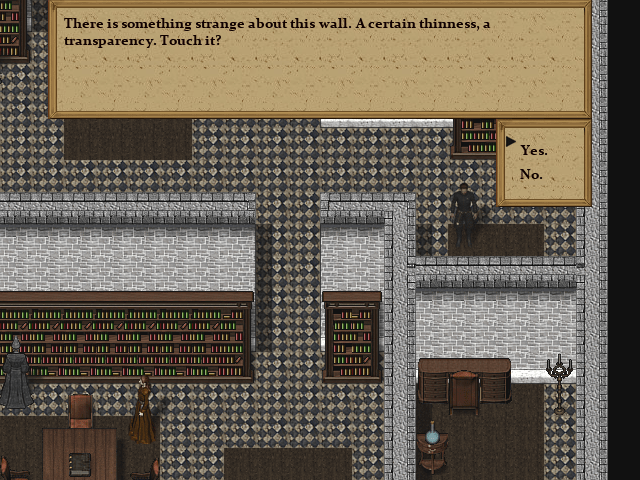
1: Visit the library to find the Burning Stone behind a wall on the first floor—a portal stone that opens a gate to a hidden area and secret boss. Touch any segment of the wall and you’ll be prompted to enter; check in the desk for the item. Look at the item’s description and it will prompt you to visit the tree in the abyss beneath the Sink.
2: After speaking to Svorad in the laboratory, talk to him again for a sequence of optional battles. The last one is extremely difficult, so it may be better to wait and come back later when you’re stronger. As a reward, you’ll get an ultimate fire scroll—the only one in the game.
3: Midway through the Academy, Dusan will prompt you to visit Jarousek’s room—the middle room in the hallway, beneath yours. He’ll sell you an item for magic defense, which is probably worth it though it’s quite expensive. Afterwards, if you speak to him again, he’ll give you keys to many of the locked rooms in the hall. Explore these to cover some of the cost of the item.

4: After being prompted by Dusan, visit Jadrana—her room is opposite Yasen’s, beneath the lecture hall. The first visit is only a conversation, but if you return after killing Yasen, and again after the statue garden, she’ll pay you and give you a healing scroll.
5: All NPC dialog in the Academy resets after the battle in the statue garden, so those interested in a bit more flavor text may want to explore.
Return to the Sink:
After completing the battles in the Machine (which resets all npc dialog in the Sink), a series of optional scenes/conversations opens up. These include many of my favorite moments of the game. To find them all, return to:
1: Melchior’s tower, where you’ll make a very important choice.
2: The House of Life, where you’ll decide what kind of person you really are.
3: The Memory Garden in the Tree Museum, where you’ll receive an ultimate healing scroll.
4: The hidden room on the second floor of the Enclave
5: The Chain House (if you completed the quest).
6: The Machine, all the way at the end, where you fought the last battle.
7: Most importantly, if you found the Burning Stone in the library, there’s a hidden sequence and secret boss if you visit the tree in the “Underground Warehouse”, beneath the Sink lake.

After the abyss, you’ll be directed to Vasek’s house. This is by far the most difficult sequence in the game, so I would suggest going only when you’re as strong as you will ever be.
Boss and Battle Strategies (to be updated soon)
Katasia (Tree Museum): This can be an absolutely brutal fight, as Katasia’s fire spell can take you out in two hits. However, she also can’t take much damage–and, as she mostly relies on magic, there’s nothing wrong with starting the battle in offensive stance. Build up tp to lunge twice in offensive stance, and she’ll go down. But it’s important not to waste turns. (I imagine she’s likely to take most players out once or twice.)
Tree Museum Battles: These can be tough, especially when you’re facing the groups of three or four. However, there are a few main things to keep in mind that can help. Take out the enemies with two handed swords first–they always pop an extremely powerful attack called “heavy blow” on the third turn, and go into offensive stance on turn five, after which they’ll be nearly impossible to survive. The enemies with shields and spears, on the other hand, go into defensive and quick stance on turn 5, so it’s wise to leave them for the end.
To approach the battles without taking a stance, I generally rely on guard break and make sure to take out the most dangerous opponents first. Alternatively, it can be useful to start in defensive stance, then wound everyone and guard to keep hp as they bleed out. To play extremely offensively, bold players can even start the battle in offensive stance, then hit the enemies with a barrage of sweeps.
Also, the larger battles are an excellent place to use bombs. There are few of these lying around in the early game, but they’ll soon become much less useful. Using one or two can be especially helpful to thin out the group of 4 you’ll fight near the end.
Model House Battles:
These battles are quite similar to the Tree Museum, as the most important consideration is to take down the two handed swordsmen first. Enemies with shields will go into defensive stance; the dual-weilders will take a quick stance. However, you’ll have Ognjen with you this time, which opens up a new dynamic to battles that (to be honest) I wish I had capitalized on a lot more in the game as a whole. Still, it’s a useful little trick to rely on here.
If Vasek is at a reasonable level, he’ll be faster than Ognjen. That means you can guard break with Vasek, then follow up for a critical hit with Ognjen on the same turn (even if the enemies occasionally interrupt him with feint). This has always been my favorite strategy, and can get you through the whole segment with no fire scrolls or healing items.
Yasen: This battle requires a strategy nearly identical to Katasia, though Vasek can survive 3 thunder attacks (rather than 2) if you’ve bought the negation field from Jarousek, which gives you more time to build up for the double-lunge. (See side quests for more information.)
The Nyarlathotep (in the statue garden): I’m adding this first, as many players have found it to be one of the most challenging fights in the game. Possibly the easiest strategy is to select defensive stance in the menu before battle, or on the first turn. Parry your first two moves, use wound to cause serious bleeding, and guard for the rest of the battle while the Nyarlathotep bleeds out. (In case you haven’t discovered it, guard actually recovers your hp each turn.) All throughout the fight, it can be useful to alternate cripple arm to minimize the melee damage. I would also save any life life essences for after the Nyarlothep uses acid–this will keep you at high hp late in the fight when you’re in the most danger.
The Machine Battles: These are perhaps the most difficult solo battles in the game. This time it’s the “heavy swordsmen” who are most dangerous–take them out as quickly as you can, as they go into offensive stance on turn three and will use heavy blow on turn five. It’s nearly impossible to survive this if you haven’t taken at least one of them down. However, for players who make it past turn five, any of the normal strategies should be enough to survive.
If the above isn’t enough–don’t be ashamed to use a fire or thunder scroll on the larger groups. They’ll never be as useful again after this, so it’s probably the best time to treat yourself.
Czarek the Deathless: Czarek may initially throw players for a loop, as he can’t be guard broken, and is healing throughout most of the battle with a weak life essence. However, he can be taken down quite effectively if you save up tp, go into offensive stance, and lunge twice with positioning.
Elder Demon: This is the hardest battle in the game by a ridiculous margin. The elder demon has 2000 hp; the highest attack of any enemy in the game; can’t be wounded; will use cripple leg every seven turns; and (if you’re not lucky) can take Vasek down in only a few rounds. Fortunately, it can be beaten with a high level character and a little patience. On normal difficulty, I would suggest attempting this fight only if you have the cold steel longsword, chainmail, a lot of concentrated life essences, and have completed everything else in the game.
There are two strategies for tackling this fight: one simple, and the other radically difficulty. (For those who take the difficult path, unlike the rest of the game, where the proper strsategy and some luck will be enough to get you through with no healing potions, I’ve never successfully beaten this fight without the cold steel longsword.) First option: you can enter the fight in defensive stance and keep Vasek alive long enough to use killing blow. I imagine very few people have ever actually used this move, but this is a good opportunity to take advantage of it.
For those who plan to beat the demon the old fashioned way, you’ll have a bit of an ordeal ahead. Cripple arm will be your best friend–start on the first turn, and renew it immediately every time it goes away. You’ll also need a steady stream of life essences, alternating weak and concentrated depending on your level of mortal peril, and maybe a healing scroll or two if the balance starts to tip. As wound doesn’t work in this fight, I find it best to rely on normal attacks from the cold steel longsword. It has a vastly elevated critical rate of 20% that definitely adds up, though there’s nothing wrong with using lunge when you’ve got enough tp. I would also avoid stances, as the demon has too much HP for defensive stance and does so much damage it would be tough to survive in offensive stance.
The ultimate fire scroll can be useful here to take away a big chunk of the demon’s hp, though it’s not a bad idea, alternatively, to save it for the next battle.
Vasek: This is also a tough fight, as Vasek is the only enemy who can use concentrated life essences and (of course) has your entire arsenal of skills, including lunge and guard break. He dishes out massive amounts of damage each turn, and can guard break and kill you in two turns, especially after he goes into offensive stance on round 8. Like the Elder Demon, Vasek can’t be guard broken or wounded, and though he requires a strategy similar to Czarek the deathless, he has just enough hp to save a double lunge in offensive stance. Most problematically, he’ll constantly use and renew concentrated life essences.
However, he can be beaten quite easily and in just a few rounds. Begin the battle by parrying until you’ve got 9 TP, then switch to offensive stance, lunge twice, and lunge again (or use a fire scroll) on the third turn.
Main Story Walkthrough
The following contains EXTREME SPOILERS. I would suggest using it only as a guide for when you get lost.
The Sink:
1: I would strongly suggest that, after completing the first dungeon, players do their best to explore the Sink. For help on this, check the side quests section—though there’s a lot of lore, items, and flavor quests you can only find just by wandering around and looking at things.
2: Go to the arena and speak to Ognjen.
3: Return to the Shrouded Man. He’ll direct you to the Tree Museum (the large, previously blocked building on the left side of the marketplace).
4: After completing the Tree Nuseum, return to the Shrouded Man. He’ll suggest that you meet at one of the houses in the residential district, north of the lake. (It’s the last house on the right, previously locked.)
5: At this point, a side-quest opens up in the House of Life.
6: Visit the golem house.
7: Speak to Ognjen in the Enclave; speak to Kleist in the marketplace (slightly north of the House of Life).
The Eaves:
1: Arrive at the Academy; talk to Zvesden in the lecture hall.
2: Meet Zvesden in your room; go to Vasek’s house; get the entrance stone for Melchior’s tower.
3: Go to the tower and talk to Melchior.
4: Return to Dusan (opens up the optional library and laboratory area).
5: Confront Yasen.
6: Kleist will approach you in the entrance hall, then ask you to meet him in the Pools, at the same place he left you originally. This starts a long sequence of events that finishes your time at the Academy. (Also, npc dialogue there is now reset as they react to your actions.)
7: With your new team member, return to Melchior’s tower.
Return to the Sink:
8: Meet Kleist (and your party member) in the Sink marketplace, in the area right above the House of Life.
9: Go to the previously locked district of the Sink, finish the sequence of events there; NPC dialogue in the Sink resets.
10: This opens an endgame sequence. I would encourage players to wander the city and see how Vasek’s actions have affected. For specific, important things, please check the side quest guide.
The Pit:
12: After this, head to The Pit (though make sure you’ve spent all your money before you get there). There’s still a few hours of story left, but it’s a straight shot to the end.
